> ## Documentation Index
> Fetch the complete documentation index at: https://generaltranslation.mintlify.site/llms.txt
> Use this file to discover all available pages before exploring further.
# X API v2 を使ってユーザーの投稿とメンションを調べる
> ユーザー投稿タイムラインエンドポイントとユーザーメンションタイムラインエンドポイントを使用すると、開発者はユーザーが作成した、またはそのユーザーへの言及を含む公開投稿を取得できます。
## はじめに
[recent search endpoint](/ja/x-api/posts/search/introduction) では直近 7 日間に投稿された投稿のみを取得できますが、user Post timeline エンドポイントと user mention timeline エンドポイントを使用すると、認可されたユーザー (user ID を使用) に対して、過去 7 日間より前の投稿およびメンションも取得できます。開発者はこれらのエンドポイントを使って、ユーザーのタイムラインやメンションに含まれるトピック、エンティティ、感情 (センチメント) を調査できます。このチュートリアルでは、user Tweet timeline エンドポイントと user mention timeline エンドポイントを使って、ユーザーの投稿とメンションを探索する方法を説明します。
## 前提条件
* user Tweet timeline エンドポイントおよび user mention timeline エンドポイントを使用するには、有効な開発者アカウントが必要です。
* [Project](/ja/resources/fundamentals/developer-apps) が作成済みである必要があります。
* 開発者アカウントに [登録](https://developer.x.com/en/portal/petition/essential/basic-info) し、[新しい Developer Console のエクスペリエンス](https://developer.x.com/en/portal/opt-in.html) を有効化している必要があります。
* [Developer Console](/ja/resources/fundamentals/developer-portal) で作成された [Project](/ja/resources/fundamentals/developer-apps) に紐づく開発者 App の有効なキーとトークンが必要です。
* [X Developer Console](/ja/resources/fundamentals/developer-portal) 上の自分の App から取得したベアラートークンが必要です。
* 承認済みの開発者アカウントをお持ちでない場合は、[申請](https://developer.x.com/en/apply-for-access)することができます。
## 承認済みの開発者アカウント
まだ開発者アカウントをお持ちでない場合は、[こちら](https://developer.x.com/en/apply-for-access)から申請してください。
## Project を作成して App を接続する
[開発者コンソール](https://developer.x.com/en/portal/dashboard) で「Create a new App」をクリックします。
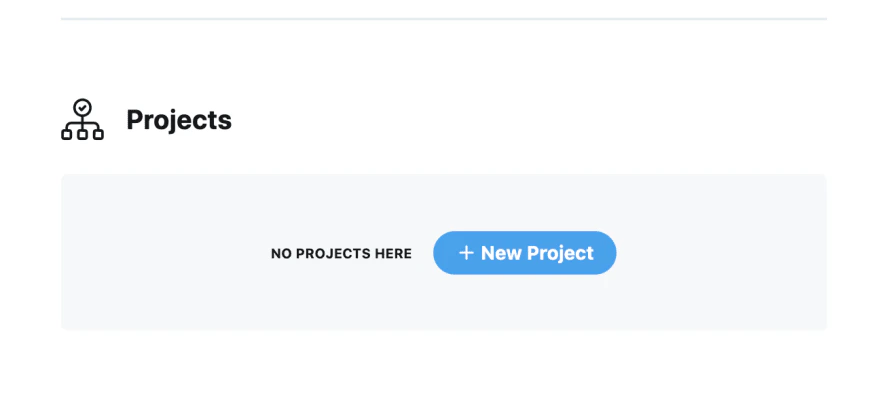 名前を付け、適切なユースケースを選択し、Project の説明を入力します。次に、新しい App を作成するか、既存の [App](/ja/resources/fundamentals/developer-apps) を接続するかを選べます (App は、X API に HTTP リクエストを送信するために必要な API キーを格納するコンテナです) 。
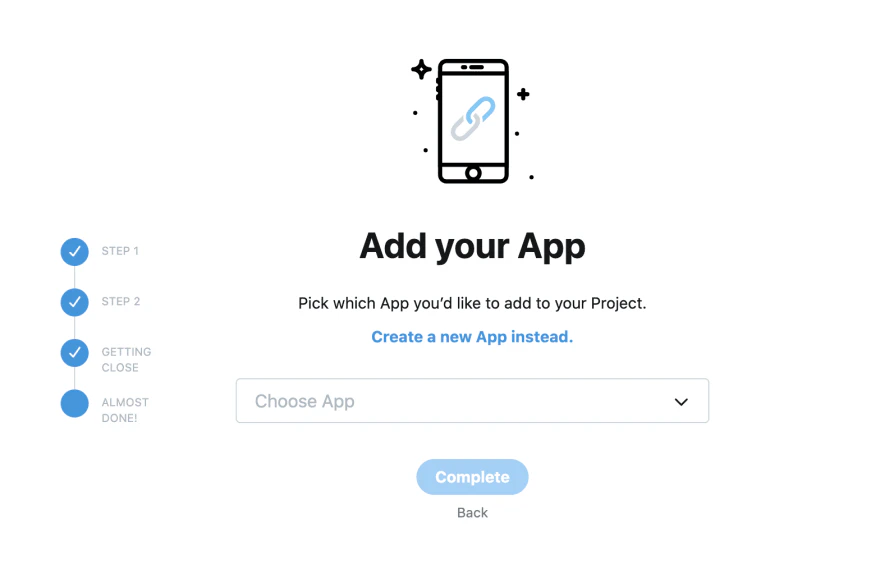 「Create a new App instead」をクリックし、新しい App を作成するために App に名前を付けます。
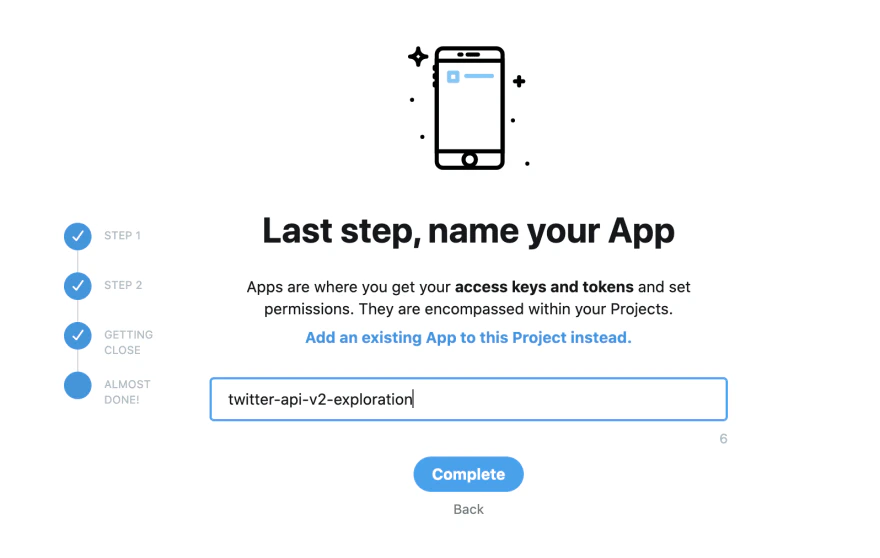 「Complete」をクリックすると、X API v2 の新しいエンドポイントに接続するために使用できる API キーとベアラートークンが取得できます。
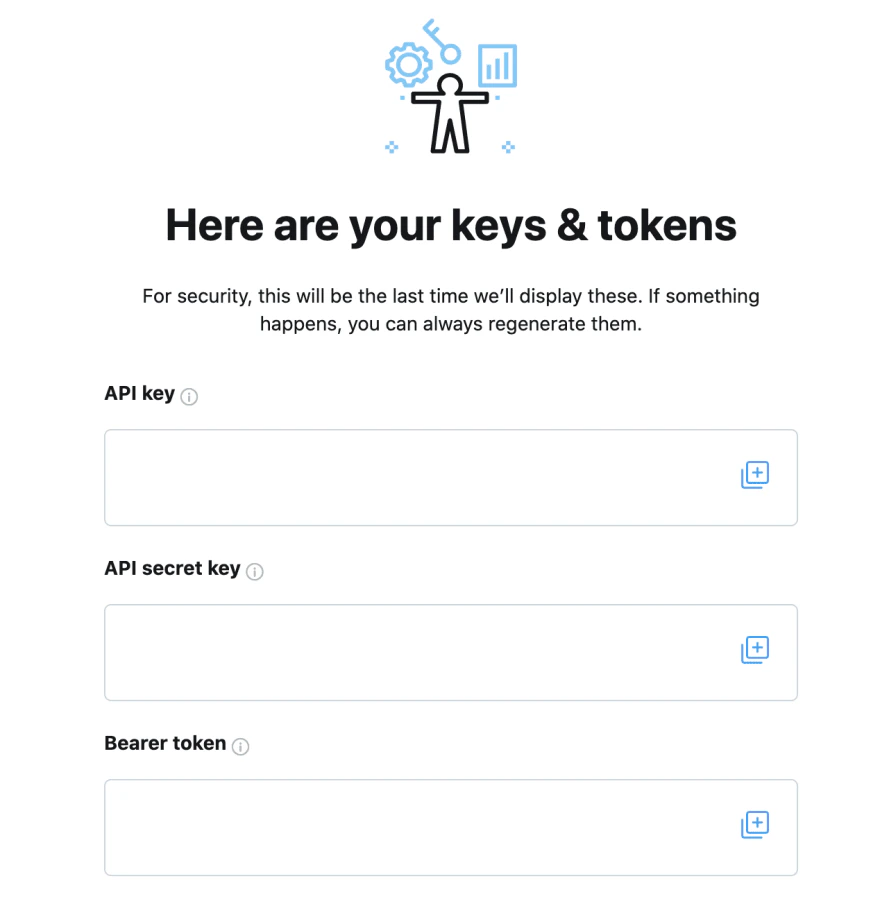 API key、API secret key、ベアラートークンの横にある (+) をクリックし、これらの値をローカルマシン上の安全な場所にコピーします。次のステップで API 呼び出しを行う際に必要になります。
注: 上のスクリーンショット内のキーは非表示になっていますが、自身の開発者コンソールでは API key、API secret key、ベアラートークンの実際の値を確認できます。
API key、API secret key、ベアラートークンの横にある (+) をクリックし、これらの値をローカルマシン上の安全な場所にコピーします。次のステップで API 呼び出しを行う際に必要になります。
注: 上のスクリーンショット内のキーは非表示になっていますが、自身の開発者コンソールでは API key、API secret key、ベアラートークンの実際の値を確認できます。
## ユーザーTweetタイムラインエンドポイントとユーザーメンションタイムラインエンドポイントで使用するユーザーIDの取得方法
ユーザーTweetタイムラインエンドポイントとユーザーメンションタイムラインエンドポイントでは、ユーザーIDを指定して投稿を取得できます。ユーザー名からユーザーIDを取得するには、新しい [ユーザー参照エンドポイント v2](/ja/x-api/users/lookup/quickstart/user-lookup) を使用します。`USER_NAME` を任意のユーザー名に、`XXXX` を先ほど取得した自身のベアラートークンにそれぞれ置き換えてください。
```bash theme={null}
curl --request GET 'https://api.x.com/2/users/by/username/USER_NAME --header 'Authorization: Bearer XXXXXX'
```
以下のように、レスポンス内にユーザーIDが表示されます:
```json theme={null}
{
"data": {
"id": "2244994945",
"name": "Developers",
"username": "XDevelopers"
}
}
```
## ユーザーのツイートタイムラインエンドポイントおよびユーザーメンションタイムラインエンドポイントへの接続
ユーザーのツイートタイムラインを取得するには、ターミナルで次の curl コマンドを実行します (必ず `USER_ID` を任意のユーザーの `id` に、`XXXX` を上で取得したご自身のベアラートークンに置き換えてください) 。
```bash theme={null}
curl --request GET 'https://api.x.com/2/users/USER_ID/tweets' --header 'Authorization: Bearer XXXXXX'
```
これらのリクエストに対する JSON レスポンスでは、デフォルトで投稿の ID とテキストが返されることがわかります (以下の例を参照してください) 。
```yaml theme={null}
{
"id": "1334200897081987072",
"text": "👀 If you are new to the X API v2, check out this step-by-step guide to making your first request https://t.co/4rZqThpSbp"
}
```
レスポンスの一部として追加のフィールド (ユーザー情報やコンテキストアノテーションなどの追加の Tweet フィールドなど) を返したい場合は、それらのフィールドをレスポンスに含めるよう、リクエストで明示的に指定する必要があります。方法については、[fields と expansions の使用方法に関するガイド](/ja/x-api/fundamentals/data-dictionary#how-to-use-fields-and-expansions)を参照してください。
これらの投稿は、お好みのプログラミング言語を使って取得することもできます。Python、Node (JavaScript)、Java、Ruby によるユーザーのツイートタイムラインおよびユーザーへのメンションタイムラインの各エンドポイント向けサンプルコードは、[GitHub リポジトリ](https://github.com/xdevplatform/Twitter-API-v2-sample-code)を確認してください。
## ユーザーの投稿を調べる
ユーザーの Tweet タイムラインエンドポイントとユーザーのメンションタイムラインエンドポイントを使って投稿を取得する方法がわかったら、そのユーザーの投稿を詳しく調査できるようになります。たとえば、ユーザーのメンションに含まれる頻出する固有表現を特定したい場合、次のようにします。
API リクエストでは、Tweet レスポンスに `context_annotations` オブジェクトを含めて返すよう指定します:
```bash theme={null}
curl --request GET 'https://api.x.com/2/users/USER_ID/mentions?tweet.fields=context_annotations' --header 'Authorization: Bearer XXXXXX'
```
レスポンスでは、メンション内に名前付きエンティティが存在するかどうかを確認できます。例を次に示します。
```json theme={null}
{
"domain": {
"id": "47",
"name": "Brand",
"description": "ブランドと企業"
},
"entity": {
"id": "783214",
"name": "X"
}
}
```
メンション内にどの人気のあるエンティティが現れているかを確認したい場合は、メンション内の各ツイートをパースして人気エンティティの出現回数を集計できます。
タイムライン内でメディアを含むすべての投稿のプレビュー画像の URL を調べたい場合は、次のようにします。
API リクエストで、`tweet.media` フィールドで `preview_image_url` をリクエストし、`attachments.media_keys` を `expansions` に指定します。
```bash theme={null}
curl --request GET 'https://api.x.com/2/users/2244994945/mentions?max_results=100&media.fields=preview_image_url&expansions=attachments.media_keys' --header 'Authorization: Bearer XXXXXX'
```
レスポンスでは、以下のように includes オブジェクト内で preview\_image\_url を確認できます。
```json theme={null}
{
"includes": {
"media": [
{
"media_key": "16_1334657439640121344",
"preview_image_url": "https://pbs.twimg.com/tweet_video_thumb/EoWn3rqU8AAtFWL.jpg",
"type": "animated_gif"
}
]
}
}
```
ユーザーの投稿の扱い方が理解できたら、他の API やサービスを使って投稿をさらに活用できます。以下は、ユーザー Tweet タイムラインおよびユーザーメンションタイムラインのエンドポイントを使用する際に、手元に置いておくと便利なリソースです。
## リソース
* [ユーザーTweetタイムラインエンドポイントとユーザー言及タイムラインエンドポイント](/ja/x-api/posts/timelines/introduction)について詳しく学びましょう。
* 利用可能な機能についてさらに詳しく知るには、[ユーザーTweetタイムラインエンドポイントのAPIリファレンス](/ja/x-api/posts/user-posts-timeline-by-user-id)を確認してください。
* 利用可能な機能についてさらに詳しく知るには、[ユーザー言及タイムラインエンドポイントのAPIリファレンス](/ja/x-api/posts/user-mention-timeline-by-user-id)を確認してください。
* ほかの[チュートリアル](/ja/tutorials)を読んでインスピレーションを得てください。